As originally posted on Tip Squirrel July 2009. I’m not one to mince words, so let’s jump right into this morning’s lesson. We’re going to discuss Image Sizing. Often overlooked, sometimes confusing, easily dismissed, but oh so important. First thing is to get to the Image Size command: Press CMD+OPT+I (CTRL+ALT+I) to open the Image Size dialogue or choose Image->Image Size from the Photoshop menu.
Pixel Dimension for Screen / Document Size for Print
Notice the two distinct areas for sizing an image – Pixel Dimensions and Document Size. Pixel Dimensions are used to size an image for a display, e.g., monitor, overhead projector, television. Document Size is necessary when outputting an image for print.
Resampling Changes All Field Values (Resolution x Size = Pixel Dimensions)
![]()
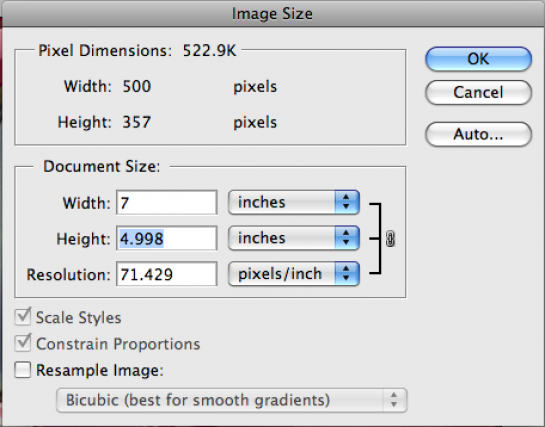
When “Resample Image” is checked, changing values in any field effects the entire dialogue. If you look closely you can see that the resolution of the image (300) multiplied by the height in inches (5) gives us a requirement of 1500 pixels to print. (300×5=1500). Resampling changes the pixel dimensions and total pixel count.
Whenever I size an image, I always set the resolution field first. Once that’s set, then I move to the appropriate width & height field for outputting my image.
No Resampling Means Image Integrity is Maintained.

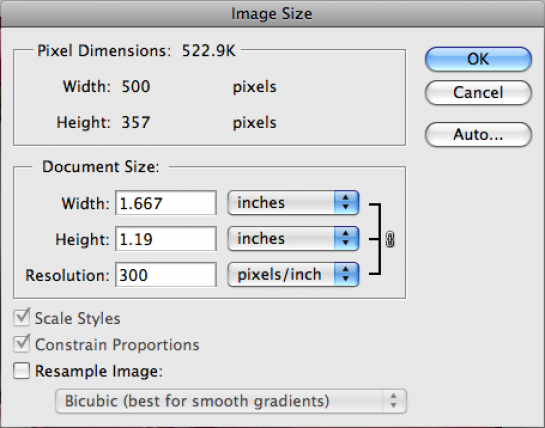
When “Resample Image” is unchecked notice how the Pixel Dimensions become locked. Adjusting resolution will simply increase or decrease the size of an individual pixel. The integrity of the image does not change because the pixel count stays the same.
Notice how the image went from being a 5×7 print to less than two inches in size. (300×1.667=500).

In the above figure any attempt to get a 5×7 print results in lower resolution. Because “Resample Image” is unchecked, there are only 500 pixels for width & 357 pixels for height.
It’s the Total Number of Pixels, not Resolution You Should Watch
I often hear folks argue about resolution in terms of printing, but what’s most important is the total number of pixels when the image is first opened. An image from a digital camera measuring 3500×2400 pixels gives you a lot more options for output then one taken off the Internet at 400×250. It will always be easier to take a large image, and reduce the size, then to take a small image an size it up. Resampling is not bad, but you are either deleting existing pixels (downsampling) or creating new pixels (upsampling). Some resolution values to keep in mind:
Screen resolution – 72-96ppi – PowerPoints, websites, emails, TV Office printing – 150ppi – laser or inkjet printing, drafts, proofing Professional printing – 240-300ppi – can be higher, but these values tend to work just fine
Keep in mind, resolution can be set TOO HIGH. If your desktop printer is rated at 240ppi you receive no benefit from outputting an image at 600ppi. In fact, you offload the resampling onto the printer which will result in a pixelated image.
Quick Crop Tool Tip
![]()
As a final tip, if you really dislike the Image Size dialogue, you can skip it and use the Crop Tool instead. Simply specify the width, height AND resolution, and your image will be resampled appropriately. (Keep in mind, all the rules still apply, the Crop Tool just executes commands quicker)
Cheers!

